Posts

Tip #1604 – Did you Know that the Customer State and City can be Printed on Your Sales IQ Reports?

When selecting the Print button from the Sales IQ Customer screen, the report does not display the customer’s state and city as you can see in the example below.  This tip will give you instructions to change your printing options enabling you to print that information on the Sales IQ Customer report.

Example
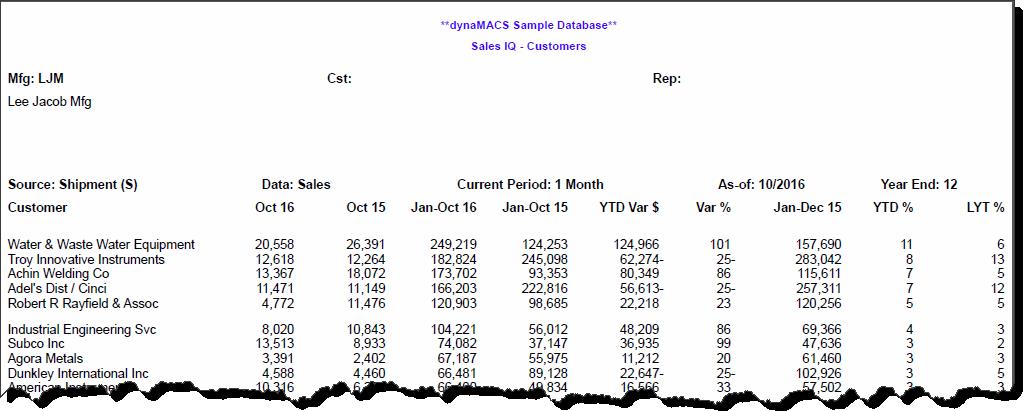
Sample Report 1


Printing the Customer State and City on the Sales IQ Report

  1.  After making selections defining your Sales IQ customer query, click on the Down Arrow button to the right of the Print button.Sales IQ Screen 1
  2. Choose Select from the drop down box.Sales IQ Screen 2
  3. You will see that the Print button has now changed to a Select button.  Choose the  Select button.Sales IQ Screen 3
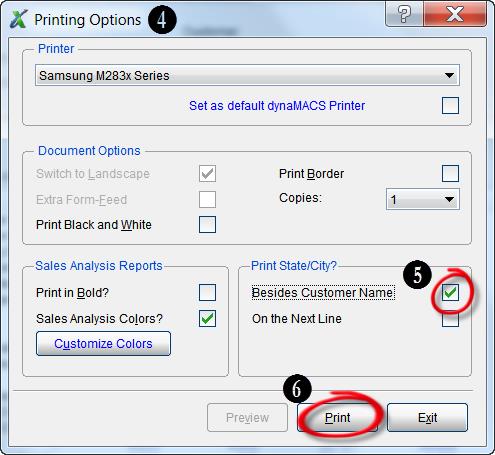
  4. A Printing Options box will open.   From here you to change your default printer and edit other printing options.
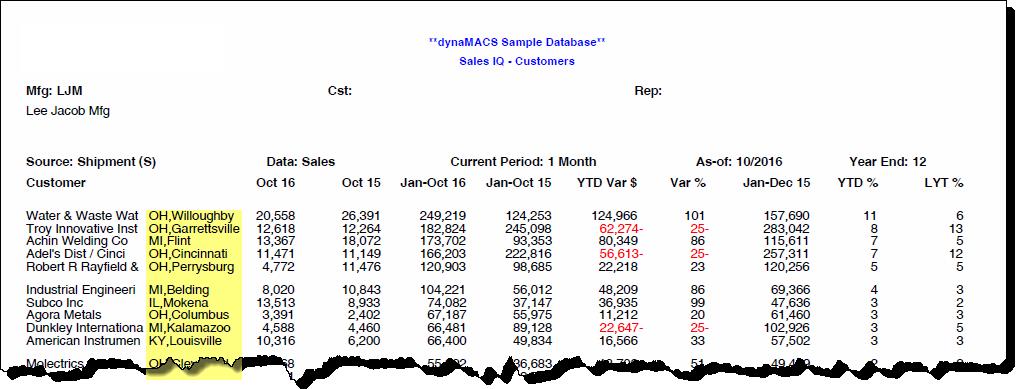
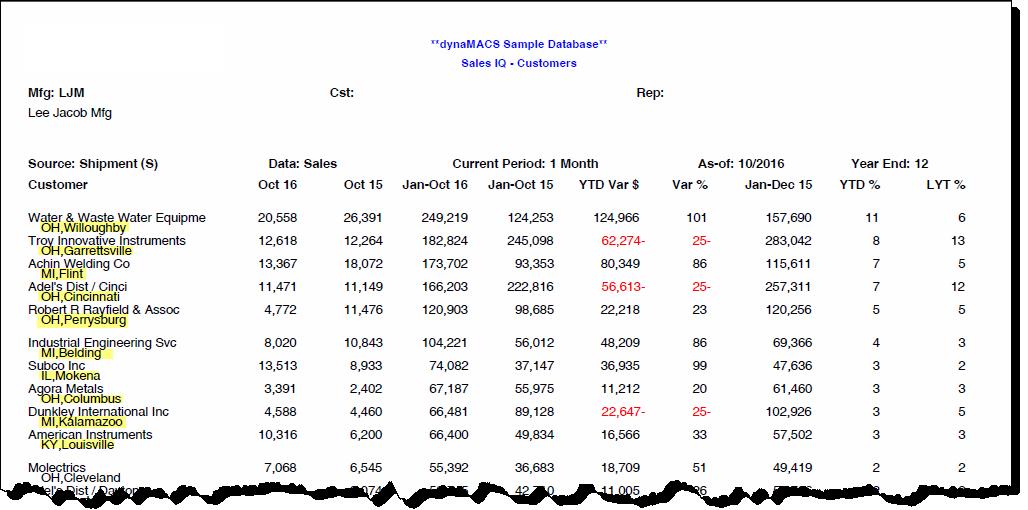
  5. Select one of the checkboxes under Print State/City? You can choose print Beside Customer Name which will print the city and state to the right of the customer name.  Or, you can choose On the Next Line which will print the state and city on the line below the customer name.  (See the examples below to view the layout of each of these options.)
  6. Select the Print button.

Printing Options

Example of Printing State and City Beside the Customer Name:
Sample Report 2

Example of Printing State and City on the Next Line:
Sample Report 3

Tip #1506 – Using the dynaMACS Manufacturer X-Reference File “Source Code ” to Classify Groups

The Source Code field in the Manufacturer X-Reference file provides dynaMACS users with a powerful reporting tool.  As an example, all customers that buy that “line” through a buying group could be identified using the “Source Code”.  This tip will explain how to accomplish this.

Updating the Manufacturer/Customer Cross-Reference with a Source Code.

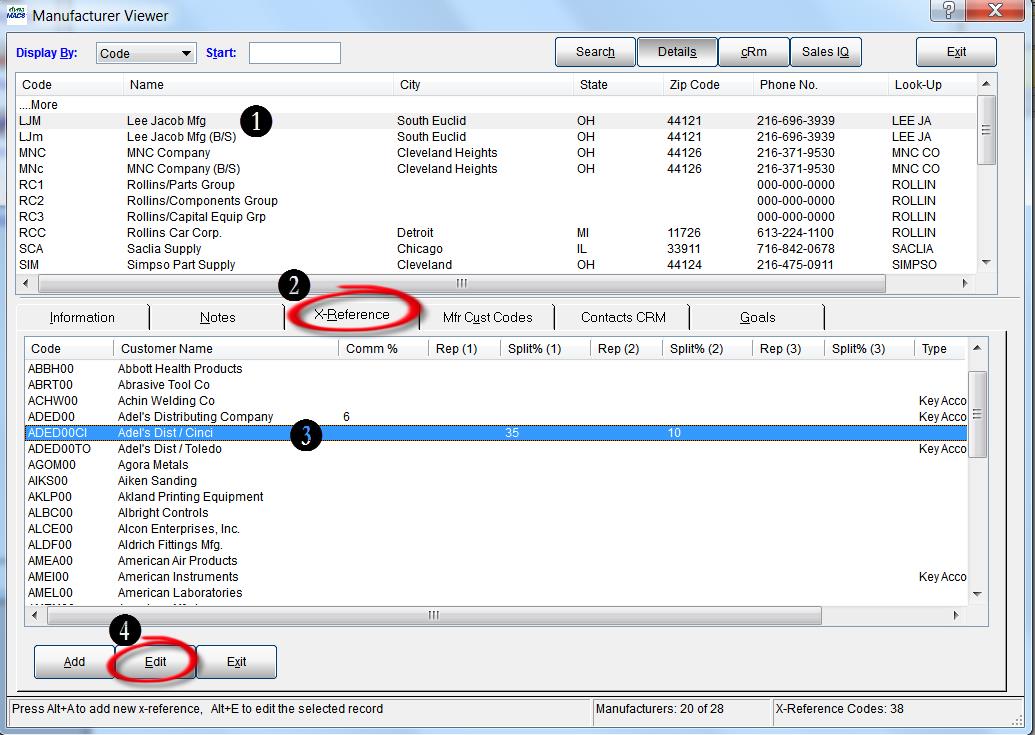
  1. From the Manufacturer Viewer screen, highlight the manufacturer.  In this example we have selected the manufacturer Lee Jacob Mfg.
  2. Select the X-Reference tab.
  3. Highlight the Customer.  In this case the customer is Adel’s Dist/Cinci.  If the X-Reference for a particular customer is not set up, you can do so by selecting the Add button.
  4. Select the Edit button.Mfg Viewer
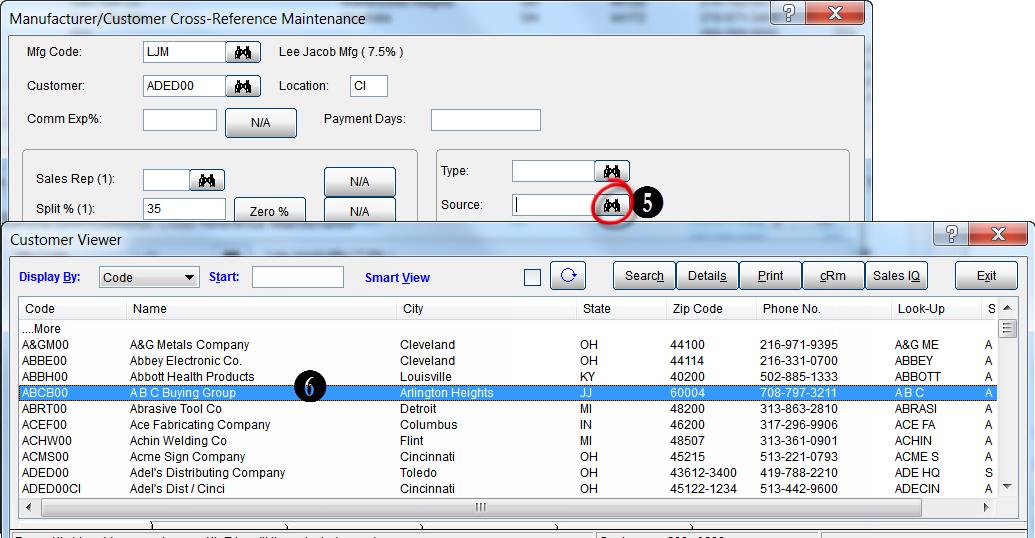
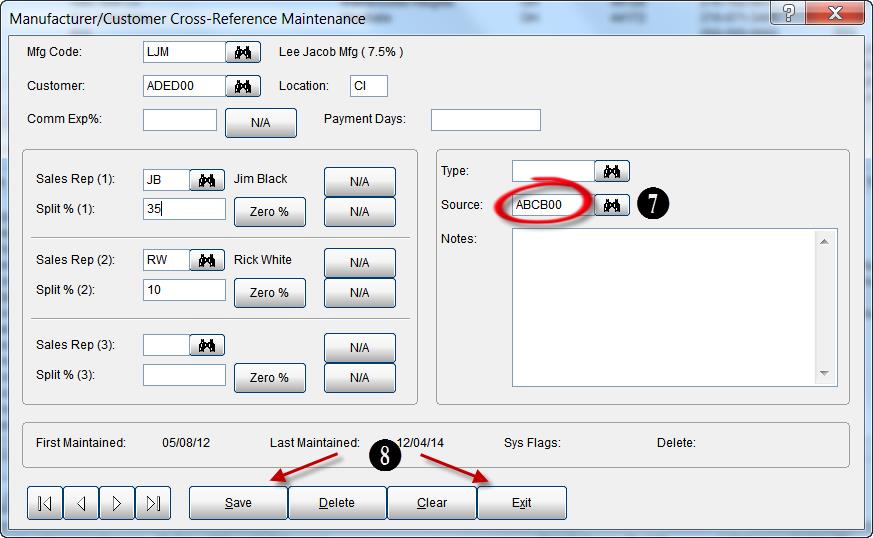
  5. From the Manufacturer/Customer Cross-Reference Maintenance screen select the Binocular button to the right of the Source field.
  6. From the Customer Viewer screen select the Customer.  In the following example we will use the ABC Buying Group.  Double click on this customer.Customer Viewer
  7. You will be back in the Manufacturer/Customer Cross-Reference Maintenance screen and the Source Code field will be populated with the selected Source Code.
  8. Select the Save button and then select the Exit button.Mfg-Cust X-ref

Filtering on an X-Ref Source Code to Include in the Sales IQ Screen

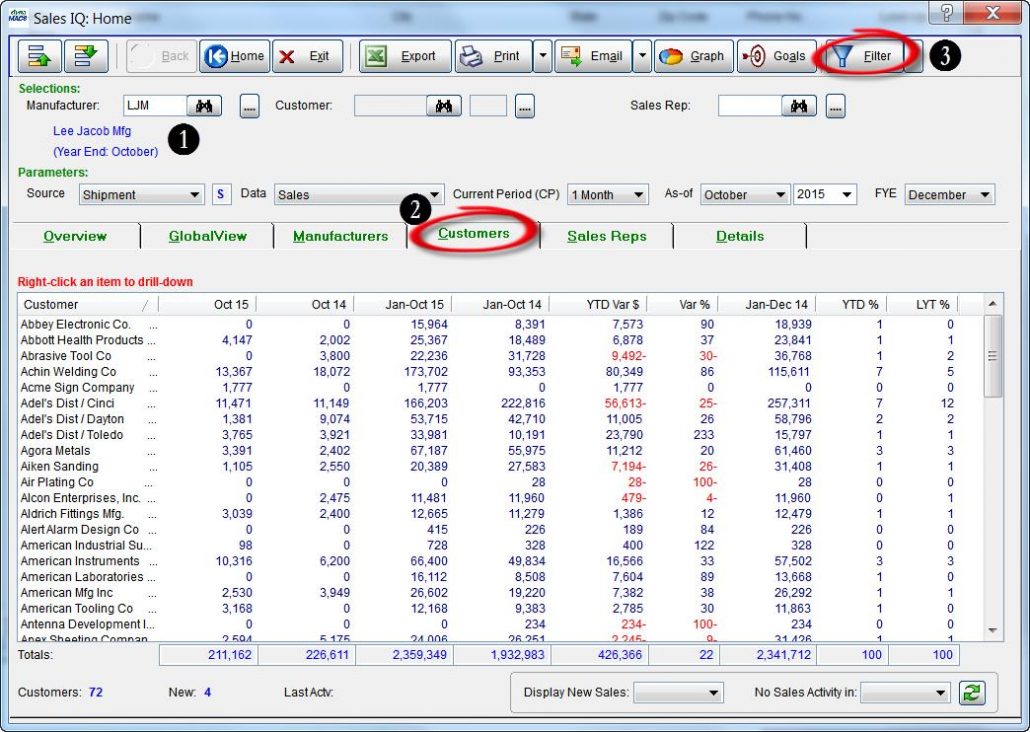
  1. From the Sales IQ screen select the manufacturer.
  2. Select the Customers tab.
  3. Select the Filter button.Sale IQ
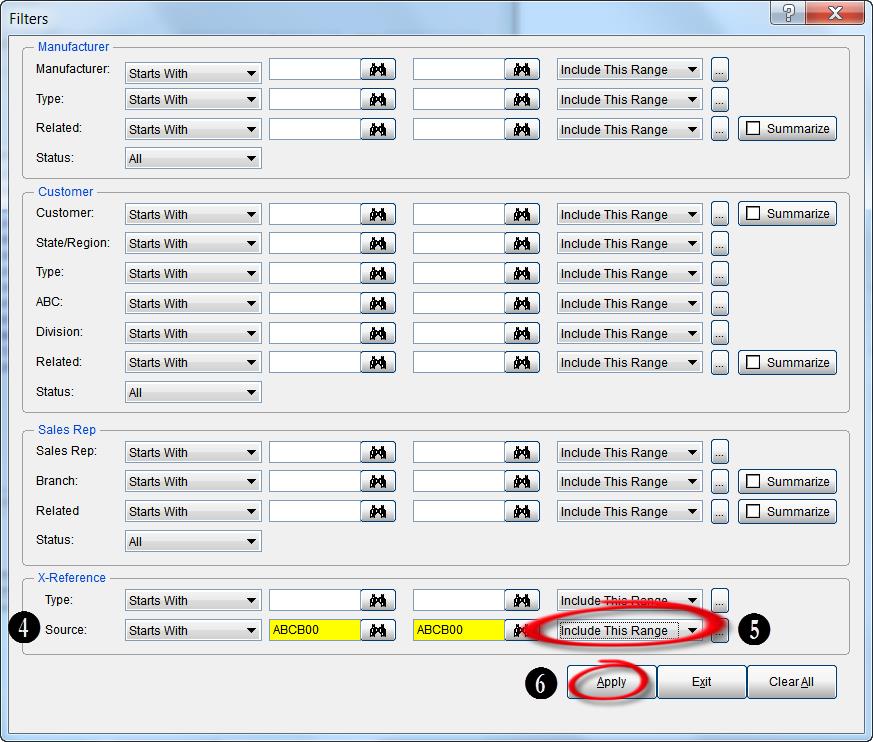
  4. In the X-Reference section at the bottom of the screen make sure “Starts With” is selected and enter the Source code for source “ABCB00” in both fields to the right.  This is the Source that was used for this example.
  5. Select “Include This Range”.
  6. Select the Apply button.Filters
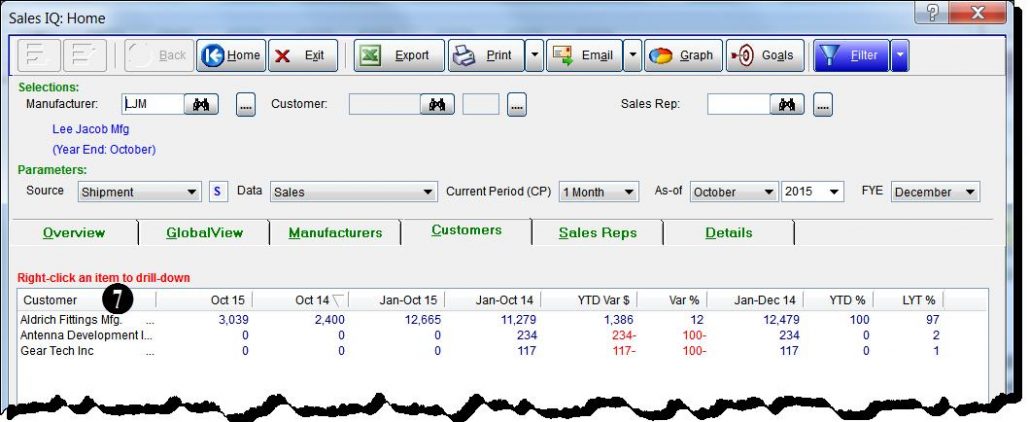
  7. The Filters screen will close bringing you back to the Sales IQ screen which will refresh displaying the filtered data.  As you can see in the example below, only the customers for the manufacturer Lee Jacob Mfg that are in the buying group will be displayed in the list. Sale IQ 2