Tip #1604 – Did you Know that the Customer State and City can be Printed on Your Sales IQ Reports?
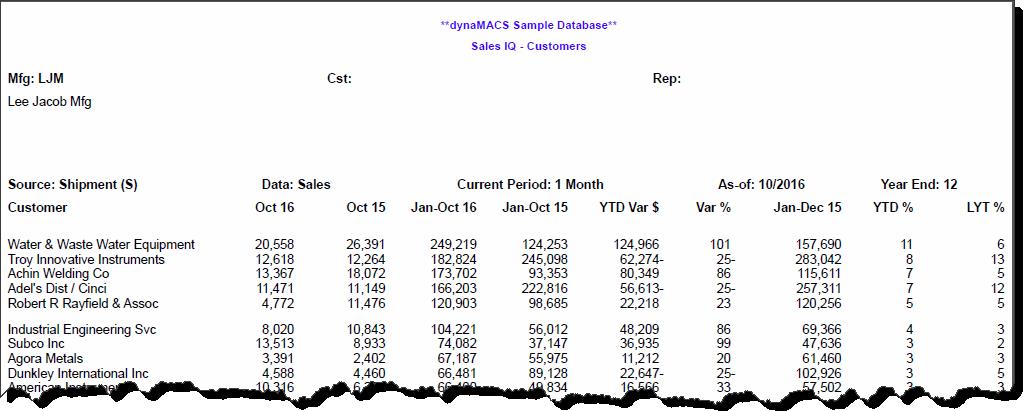
When selecting the Print button from the Sales IQ Customer screen, the report does not display the customer’s state and city as you can see in the example below. This tip will give you instructions to change your printing options enabling you to print that information on the Sales IQ Customer report.
Example
Printing the Customer State and City on the Sales IQ Report
- After making selections defining your Sales IQ customer query, click on the Down Arrow button to the right of the Print button.

- Choose Select from the drop down box.

- You will see that the Print button has now changed to a Select button. Choose the Select button.

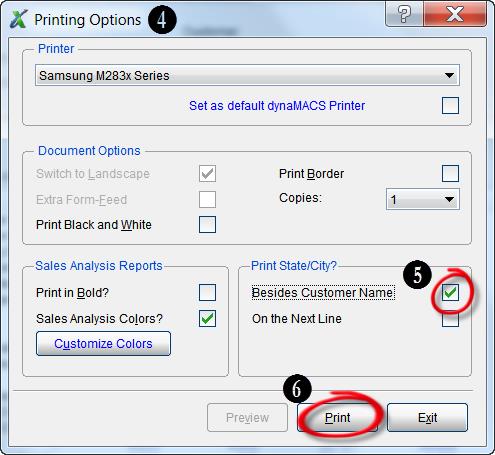
- A Printing Options box will open. From here you to change your default printer and edit other printing options.
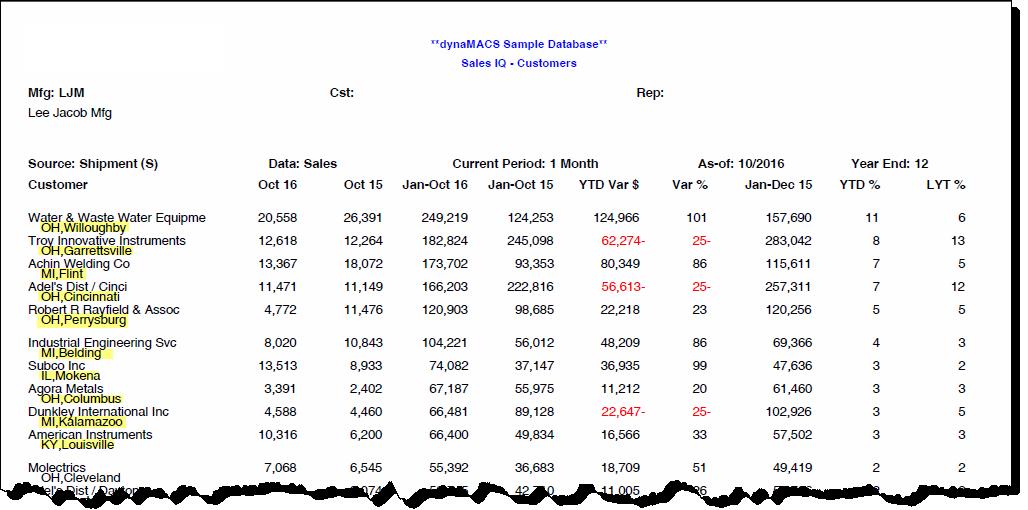
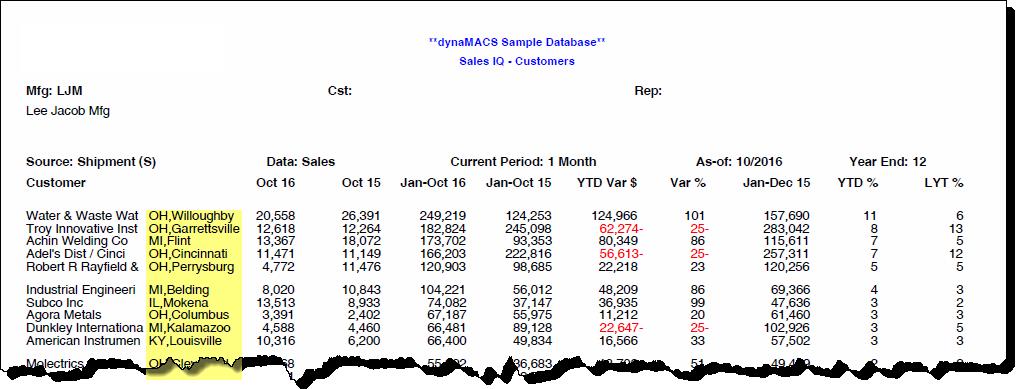
- Select one of the checkboxes under Print State/City? You can choose print Beside Customer Name which will print the city and state to the right of the customer name. Or, you can choose On the Next Line which will print the state and city on the line below the customer name. (See the examples below to view the layout of each of these options.)
- Select the Print button.
Example of Printing State and City Beside the Customer Name:
Example of Printing State and City on the Next Line:
